Hello friends! This project has been in the works for a long time and I am excited to finally share the results of our basement laundry room renovation with you!
We originally started this project in May as part of the eight-week One Room Challenge event. Though we didn't finish within that timeline, my husband Sean and I continued on, completing this DIY renovation on weekends and around our day jobs and finally creating the laundry room of our dreams!
I'm thrilled to have partnered once again with The Home Depot Canada on this renovation. As do-it-yourselfers, we know we can always find the necessary materials and on-trend products in their stores to bring our vision to life.
Basement Laundry Room Renovation
I'm not exaggerating when I say that, in 15 years of completing DIY renovations of our homes, this was our most extensive, hardest, and most rewarding project ever.
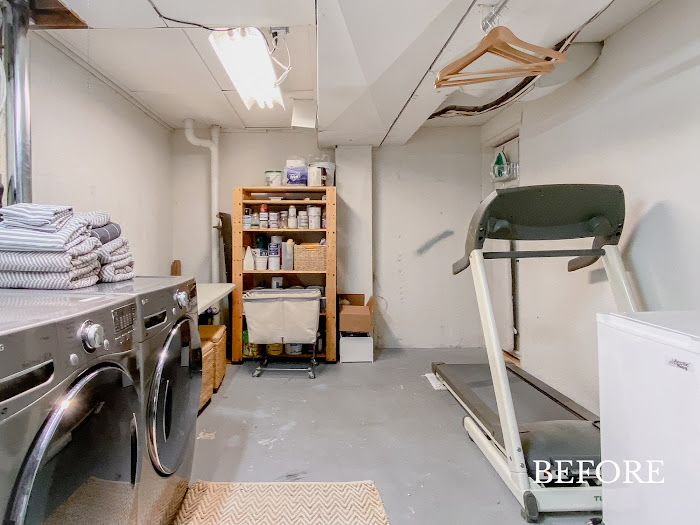
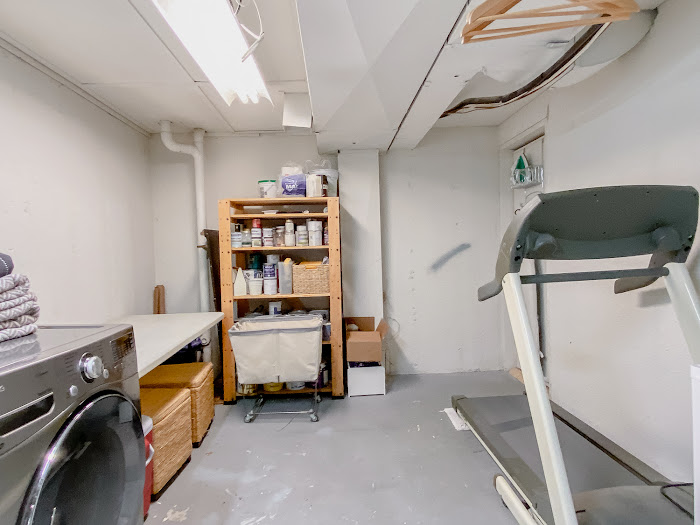
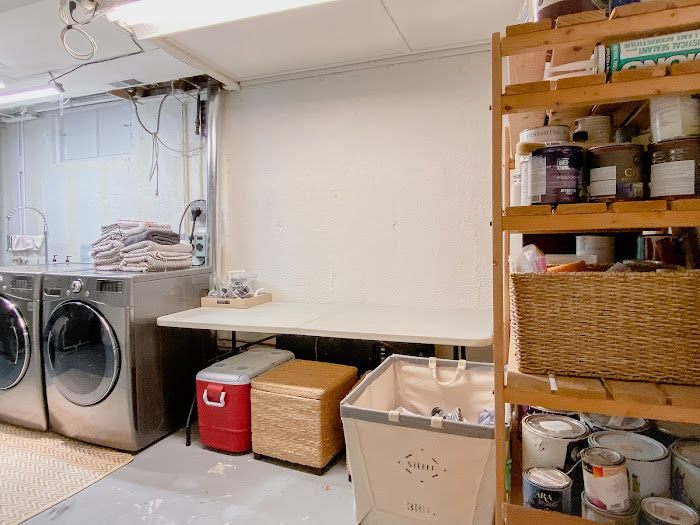
We literally built this room from the bottom up. We started this project with two laundry machines in the middle of a large unfinished utility room. While it was functional, what we really wanted was an attractive and dedicated laundry room. I envisioned a space where the washing machine wasn't sitting on the concrete floor, where laundry detergents and laundry baskets could be stored away, with good lighting and proper counter space instead of a collapsible folding table on which to fold our clothes.
To increase the function and make it more aesthetically pleasing, our plan was to turn our large utility room into a separate basic utility room, and combined laundry and workout space with the help of The Home Depot Canada.
To increase the function and make it more aesthetically pleasing, our plan was to turn our large utility room into a separate basic utility room, and combined laundry and workout space with the help of The Home Depot Canada.
Are you excited to see the new laundry and workout room??
Unfinished Basement Laundry Room Ideas
That is a pair of happy (and exhausted) renovators right there. Before I dive into the details, let's revisit where this room started. This renovation required a lot of work to divide the utility room in two and finish every surface in the laundry area.
Creating a dedicated laundry room meant installing a new subfloor, building new walls, and getting an HVAC professional and electrician in to do some tasks. We framed out the ceiling (at three different heights!), installed heavy sheets of drywall overhead, and did the mudding and sanding - all tasks we've never done before.
It can be scary to try something you've never done before. We learned a lot by watching YouTube videos, through trial and error, and going to the professional by asking the experts at The Home Depot Canada. We bickered and fought, made many mistakes, and spent days covered in drywall dust. But we did it, and building that room is probably one of the things we've done as a couple that I'm most proud of.
With a structure in place, we moved onto the design details: installing peel and stick wallpaper, laminate flooring, painting walls, and installing shiplap. The cabinetry was a mix of assembled cabinets we bought off the shelf, and panels and shelves we made ourselves to match the cabinetry.
With a structure in place, we moved onto the design details: installing peel and stick wallpaper, laminate flooring, painting walls, and installing shiplap. The cabinetry was a mix of assembled cabinets we bought off the shelf, and panels and shelves we made ourselves to match the cabinetry.
One thing I enjoyed about this project was the availability and ease of different shopping options. We were able to save a lot of time and energy by shopping online at homedepot.ca and having some of the larger and cumbersome products like the six cabinets and 7' side panels delivered right to our door.
For harder to find products like the single lite door in a specific size, I was able to purchase online while there was inventory and select the “Pick up in store” option and pick up the door at my convenience. It was great knowing that we had all the materials we needed to complete our renovation ready and waiting.
Of course, we were able to shop in store too. I won't soon forget date night in a rented Home Depot Canada van with take out burgers and 15 sheets of drywall loaded in the back!
Laundry Room Layout
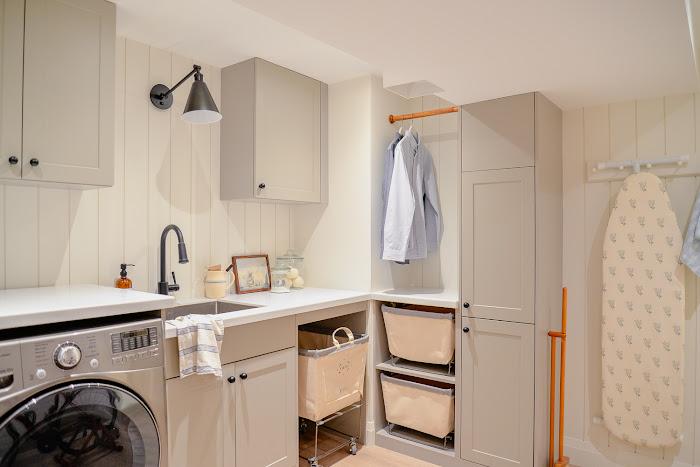
It was challenging to figure out the layout of the laundry room. The low ceiling height in parts of the room really constrained us in terms of where we could put our cabinetry. An L-shaped layout for the laundry zone maximized storage and gave us lots of open floor space. We have a laundry chute that was put in years ago by previous owners, and luckily this layout allowed us to leave the laundry cart out beneath the chute to catch falling laundry, or tuck the cart away if needed.
We've used some of the new cabinets to store workout equipment. As the laundry room isn't that large, its great to have everything tucked neatly away when not in use.
Design Ideas For A Basement Laundry Room
There are so many fun details in this room that truly transform it from an average laundry room into a space that is enjoyable in which to spend time.
In terms of design, we've tried to make a comfortable and pretty laundry room that works well with the rest of our basement. It features a neutral, light palette like the rest of the basement and is decorated in a classic and coastal style.
Laundry Room Cabinetry:
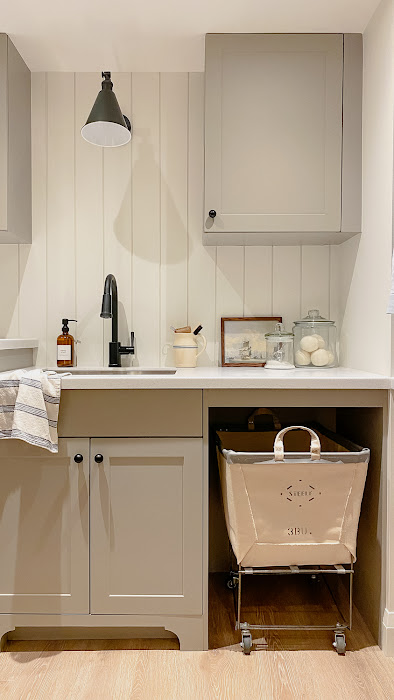
For storage, we used assembled cabinets from the Hampton Bay line in Edson Grey available at The Home Depot Canada. I chose this specific line as it featured a variety of cabinet sizes, offered accessories like side panels and filler panels, and came in a neutral paint color.Installation was very easy and we had the cabinets installed in just a few hours. While our laundry room would have been perfectly fine using these cabinets as is, we added unique DIY details to really make this space special. It was surprisingly easy to make custom parts for our cabinets using melamine panels, veneer edging, and BEHR Dynasty paint, all found at The Home Depot Canada.
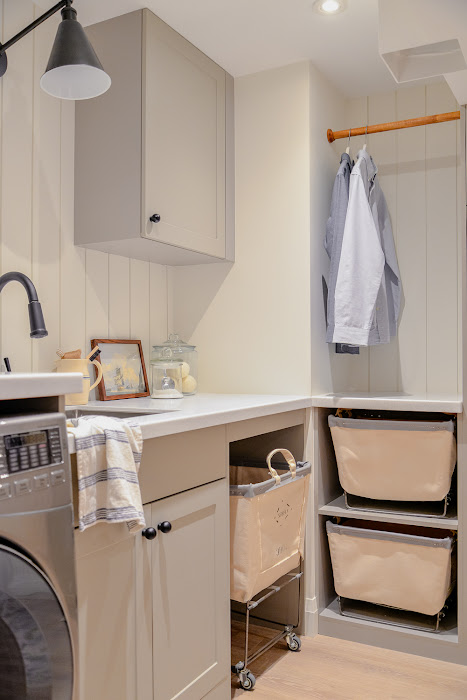
One element we added is the custom storage tower beneath the low bulkhead. We made this by stacking two upper cabinets together and using panels to hide the seams and extra space above the cabinets. This gave us extra storage space for laundry essentials and workout equipment.
We also built coordinating panels to create the storage shelving for the laundry baskets, and to support the countertop over the laundry machines. My favourite DIY detail though was the decorative custom toe kick we added onto the sink cabinet. It was simple to create and elevates this basic cabinet.
Solid Surface Corian Countertop:
One of our biggest design decisions was selecting the material for the countertop. There are lots of choices for laundry room countertops. You can opt for a laminate countertop, butcher block counter, natural stone, or even stainless steel like we had in our previous laundry room.For this room, we chose Solid Surface by Corian. We've had Corian counters in our craft room and in our last basement and I really like their look and feel. They are easy to keep clean, waterproof, and highly resistant to scratches, stains, and heat.
It seems that everywhere you look these days, people are putting peg rails into their homes. And for good reason! Peg rails are functional and handy and work in any type of room.
I hope you've enjoyed this tour of our laundry room and workout space! We couldn't have done it without The Home Depot Canada. There was so much we learned on this project and no matter your skill level, I encourage you to bring your laundry room dreams to life.
The Home Depot Canada makes the process of selecting and installing a countertop very easy and stress-free. I checked out the samples in store and booked a Measure and Quote appointment with the kitchen department. A technician came to my home and took very precise measurements of all three countertop segments. The quote was quite reasonable and the measuring fee was credited towards the cost of installation.
Three weeks later, the installer came back to my home to install the countertops and attach the undermount sink. The countertops came out perfectly, with softly rounded edges just like we wanted. We chose the Everest pattern which features white, black, and grey speckles against a light grey base. The light colour reflects light around the room and helps to make the space feel brighter.
Peel and Stick Wallpaper:
The wallpaper, GlucksteinElements Faux Grasscloth Natural Grey Peel and Stick Wallpaper, was one of the first design elements I picked for this space. I knew the neutral tones would work with the beachy flooring and taupe cabinets without making this small laundry room feel busy. Peel and stick wallpaper is also very easy to install and is a great way to bring personality to a space.Laminate Flooring:
As luck would have it, we had four boxes of flooring leftover from when we renovated the basement craft room in 2018. The flooring had since been discontinued but I managed to track down the last three boxes in existence! It was enough to finish the laundry room and give the entire basement the same flooring and a consistent flow.Hardware and Faucet:
For a hardworking space like a laundry room, I like to use black metal finishes. I envision us cleaning paint brushes at this sink and the black metal faucet and cabinet knobs are a great option for hiding dirty fingerprints. The faucet also features a single handle and a pull-down spray which makes it very easy to use and keep the sink clean.Utility Sink:
A deep sink is a great idea for the laundry room and this Kraus 16 gauge undermount single bowl sink is exceptional. It features a 12" bowl which is deep enough for hand washing laundry or filling pails of water. The stainless steel finish is durable and it comes with a protective bottom grid that can also function as a drying rack. I love the rectangular profile and the slightly rounded corners which ensures water doesn't pool.Lighting:
Adequate lighting is important, especially in rooms that don't get natural light. We used recessed pot lights throughout the room and a classic swing arm wall sconce above the sink. I found this sconce on homedepot.ca and love its old school look. It features a large shade which creates a focal point in the room and illuminates the sink area wonderfully.Vertical Shiplap:
Like the flooring, I used shiplap in this room for consistency. We have shiplap in the adjoining hallway and on the basement fireplace so it made sense to carry it into this room too. We've used it here in a smaller width and installed it vertically. Installing it vertically helps make the room feel taller and brings that coastal feel into the space.
Peg Rail
It seems that everywhere you look these days, people are putting peg rails into their homes. And for good reason! Peg rails are functional and handy and work in any type of room.
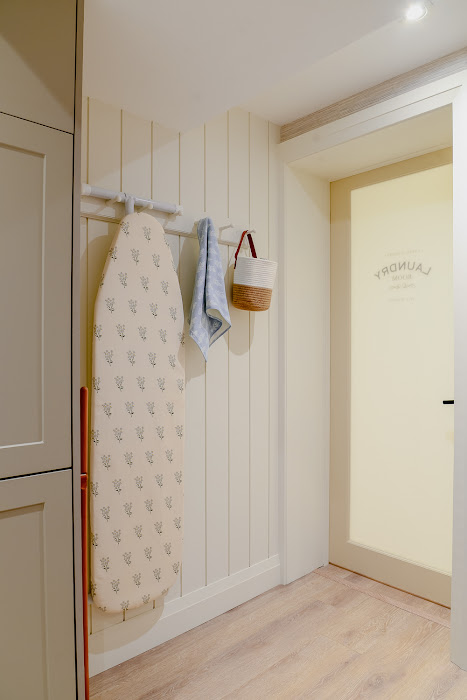
We made this simple peg rail using a piece of wood, shaker pegs, leftover trim, and paint. I knew I wanted to store my ironing board with its DIY ironing board cover on the wall and the peg rail holds it perfectly. There's even room to hang workout towels and other other accessories.
Cabinetry and Door Paint:
In painting our custom cabinetry panels, I discovered BEHR Dynasty paint and was extremely pleased with it. The coverage was excellent and I was able to do the panels with a single coat. We painted our melamine panels in an eggshell finish and they ended up looking just like the factory-finished cabinets. I was impressed with the finish and durability of this paint so I used BEHR Dynasty paint on the laundry room and craft room doors as well in a muted sandy hue (BEHR Roman Plaster PPU7-10).
Laundry Room Door:
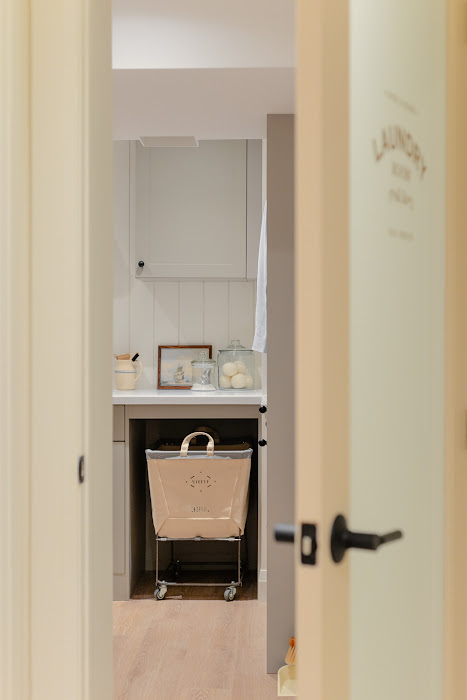
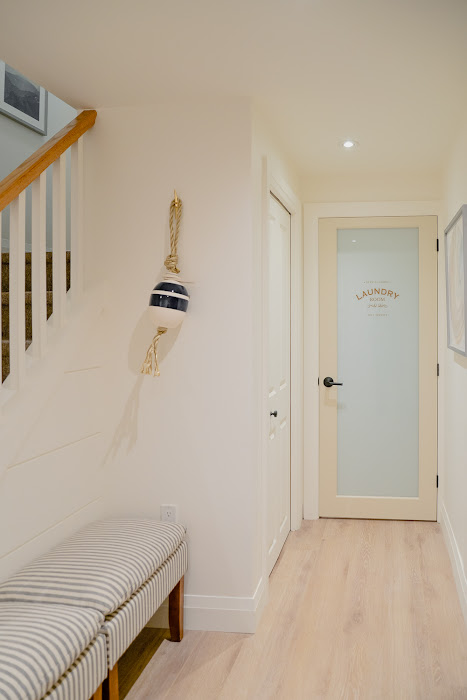
Given that this laundry room has no natural light, I wanted to have a glass door to allow light to flow in from the rest of the basement. This 1-Lite French Door features laminated tempered glass. It has a frosted pattern that is integrated into the glass itself; the glass is smooth on both sides. This allowed me to embellish the door with a DIY decal I made on my Cricut machine. It matches the decal on our craft room door and really creates a unique and fun look for this area.Laundry Room Accessories:
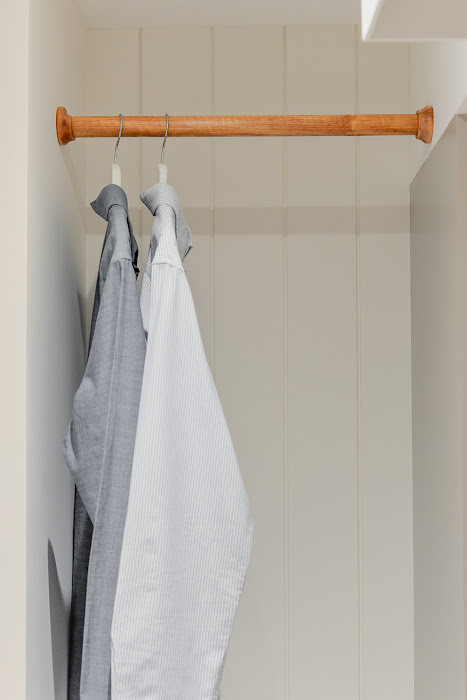
To keep the laundry room from feeling too cold and utilitarian, I've decorated with laundry and cleaning accessories that are both beautiful and functional. The laundry drying rack, woven basket, and wooden hanging rod (made from a large dowel) add warmth and look so lovely when they are put to use.
One quick and easy design idea is to keep your laundry detergent on display in a glass jar. It's the little things like this that can make laundry feel less like a chore.
I hope you've enjoyed this tour of our laundry room and workout space! We couldn't have done it without The Home Depot Canada. There was so much we learned on this project and no matter your skill level, I encourage you to bring your laundry room dreams to life.
Now here's one last look at the Before and Afters of this space:
"But what happened to the utility room?", you might be wondering. We've made a few small improvements in that space too and I'll share that with you next!
***
Product Sources:
Cabinetry - Hampton Bay line in Edson Grey
Lighting - Abilene 1-Light Old Bronze Wall Sconce
Door paint - BEHR Dynasty in Roman Plaster (PPU7-10)
Wall paint - Benjamin Moore White Dove
Dryer - LG Electronics 7.4 cu. ft. Smart Front Load Electric Dryer with AI and TurboSteam in Graphite Steel
Countertop - Corian in Everest
Rolling cart and laundry baskets - Steele Canvas Laundry Bin Storage
Glass jar (large) - Anchor Hocking 1 Gallon Heritage Hill Glass Jar with Lid
Drying rack, oval basket, broom with dustpan, raffia sponge - Zara Home
Striped pitcher - vintage
Spray bottle - Amber Glass Spray Bottles Set 14 Pack
Soap dispenser - 16OZ Amber Glass Soap Dispenser 2 Pack
Bottle labels - 144 Laundry Room Labels Preprinted Set
Ship print - unknown artist, Shipping In A Calm (public domain)


